Changing style preferences, and trends in design and manufacturing have altered the way many people feel about creating and designing their home interiors. One great looking and very popular choice is using shiplap for walls, which no longer is considered an exterior styling, but rather has found an effective and beautiful place in the interior of many homes.
Shiplap, in simplest terms, is a form of inter-locking plank board that is installed with an interlocking fit, and often features a tongue-and-groove connection that provides a firm and solid fit to ensure stability. Most often made of raw wood, these panels are placed with ease, making the installation relatively fast, while ensuring a quality look that is sure to please. Designers everywhere are making great use of the shiplap for walls to create rustic and beautiful interiors that are both inspiring and beautiful.
The use of shiplap for walls provides an relatively simple way to add great texture and authenticity to any 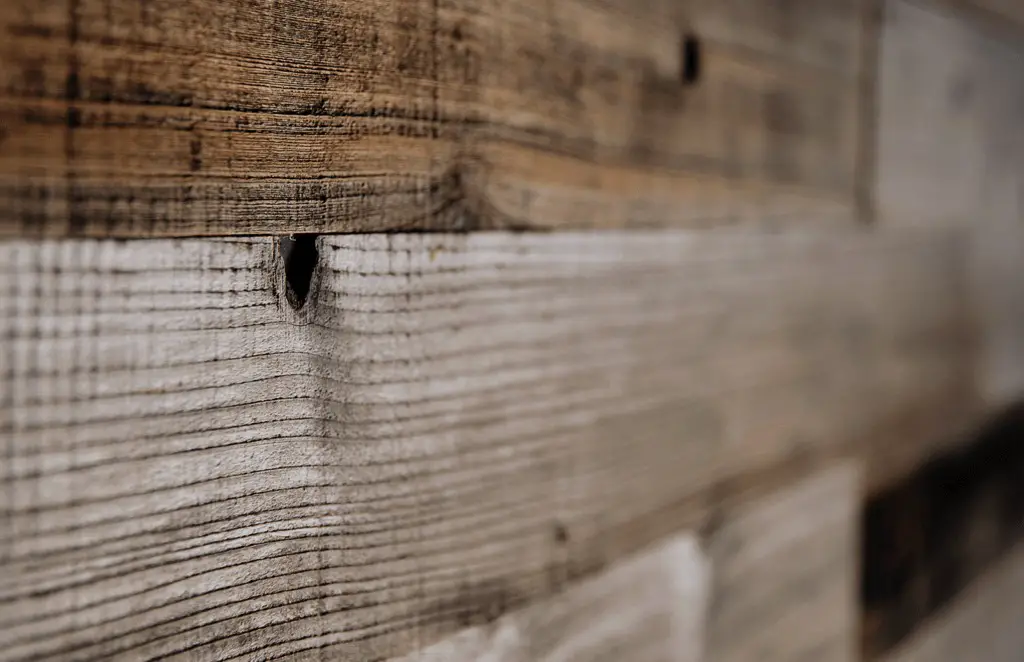 space, while easily adding a rustic, aged and vintage feel. A major attraction to using shiplap for walls is the relatively economical nature of these interior installations, as it makes a great DIY project, and requires limited tools and equipment to achieve amazing results. The boards themselves provide the opportunity to stain and/or paint in any variety of colour, which means there is complete flexibility to achieving the desired look and feel. Using shiplap on your walls provides incredible design flexibility, while adding brilliance and authentic rustic charm to any space in your home.
Advantages of Shiplap for Walls
Flexibility of Installation
Shiplap for walls can be installed in almost any orientation, whether vertical, horizontal, or even diagonally or in patterned groupings. The flexibility of use makes it an attractive option depending on the look and feel you are trying to achieve.
Ease of Installation
As installing shiplap for walls is very straight forward, it doesn’t require a great deal of carpentry experience to complete a great looking installation. Various types of products are available, from pre-made panels, to individual boards, so finding the right solution to match your experience and ability is very simple.
Treatment, placement and protection options
As shiplap is made of natural materials and genuine wood, the types of finishing you place on the wood, as well as the surfaces you place it on are varied. Shiplap can be installed over nearly any surface, and will 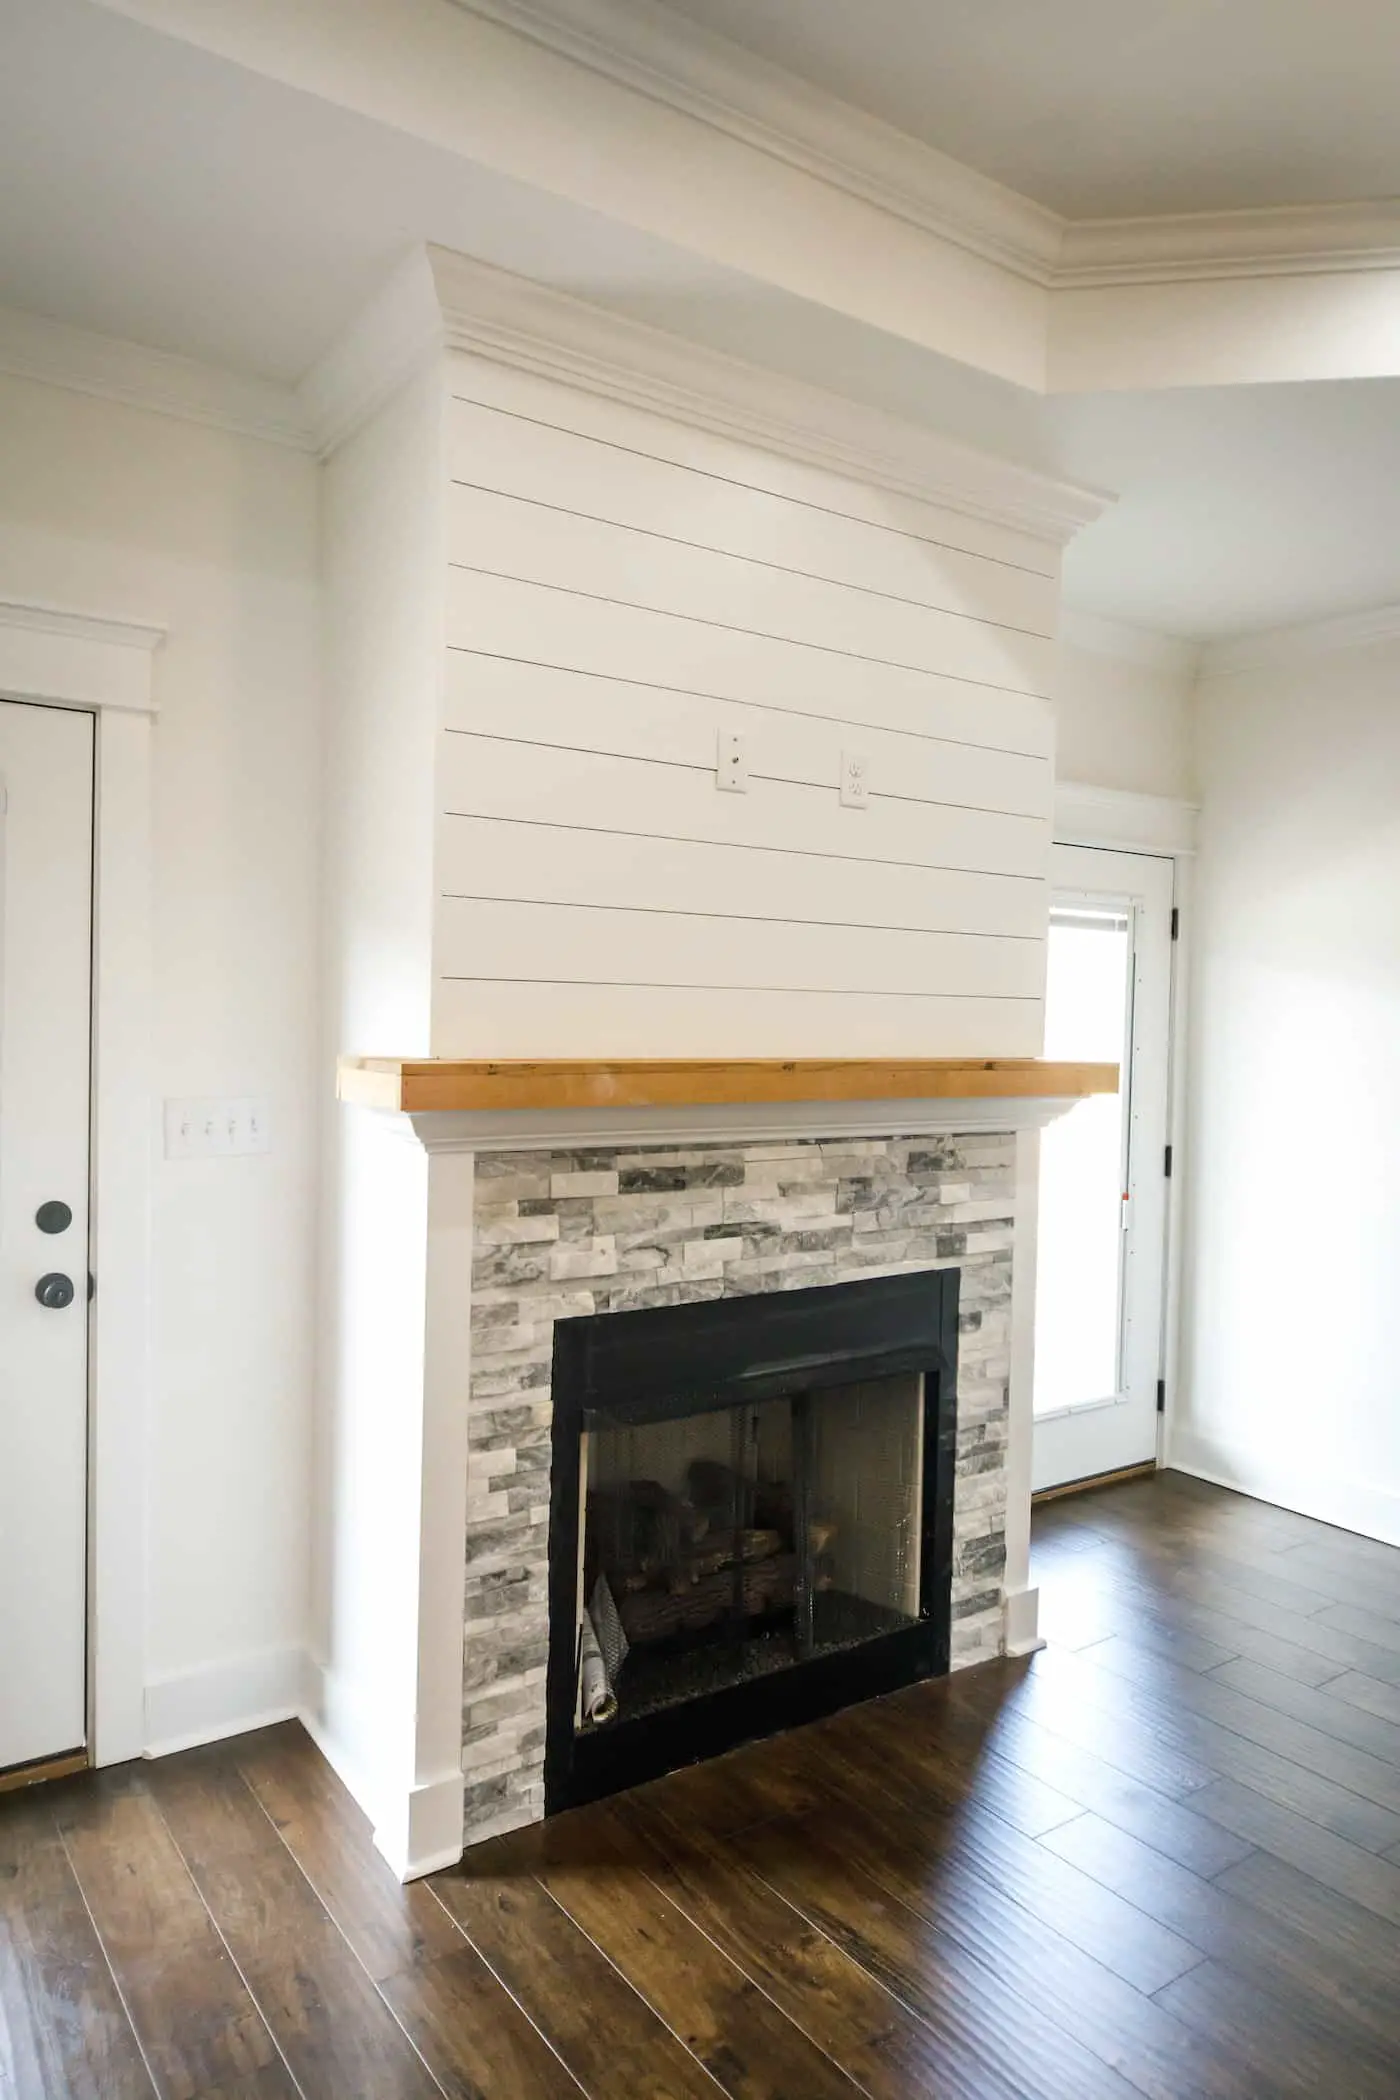 ultimately provide great additional support to the wall that is placed upon.
Natural rustic appearance
The types of materials you select will define the ultimate look and feel of the shiplap you install, but with a wide range of choices for wood, stain, paint and color, you can easily achieve the design aesthetic that best suits your style and preference. The natural rustic nature of these installations means that you will have an easily installed, and amazing looking accent or feature wall to enjoy!
Easy upgrades and repairs
As the building of shiplap for walls is fairly easy, and the fact that the mechanics of the build are straight forward, it is equally easy to remove and/or replace pieces of the wall without much trouble. This means touchups, replacements and other maintenance and repair can be done quickly and easily, and makes shiplap walls much more practical than some other solutions.
Shiplap vs. Alternatives
There is often some confusion that arises when discussing shiplap, as many confuse shiplap with another form of siding known as Clapboard. The primary difference is that a clapboard features overlapping the edges of the wood, whereas shiplap uses a form of Tongue-and-groove edging that allows the boards to fit close and tightly together. Additionally, shiplap for walls can be placed both horizontally, or vertically, whereas a clapboard siding its only placed horizontally, as it is normally used on the exterior of a building, and the overlapping design helps to prevent moisture from seeping between the boards. The fine connectivity of shiplap for walls offers a more uniform and tailored feel in deference to clapboard siding.
Shiplap for Walls – Ideas & Inspirations
These inspirations are provided by Plank and Mill, who provide an excellent selection of fantastic peel-and-stick options for wood paneling and shiplap for walls. Using such an approach can save a great deal of time, and makes any shiplap DIY project much easier.
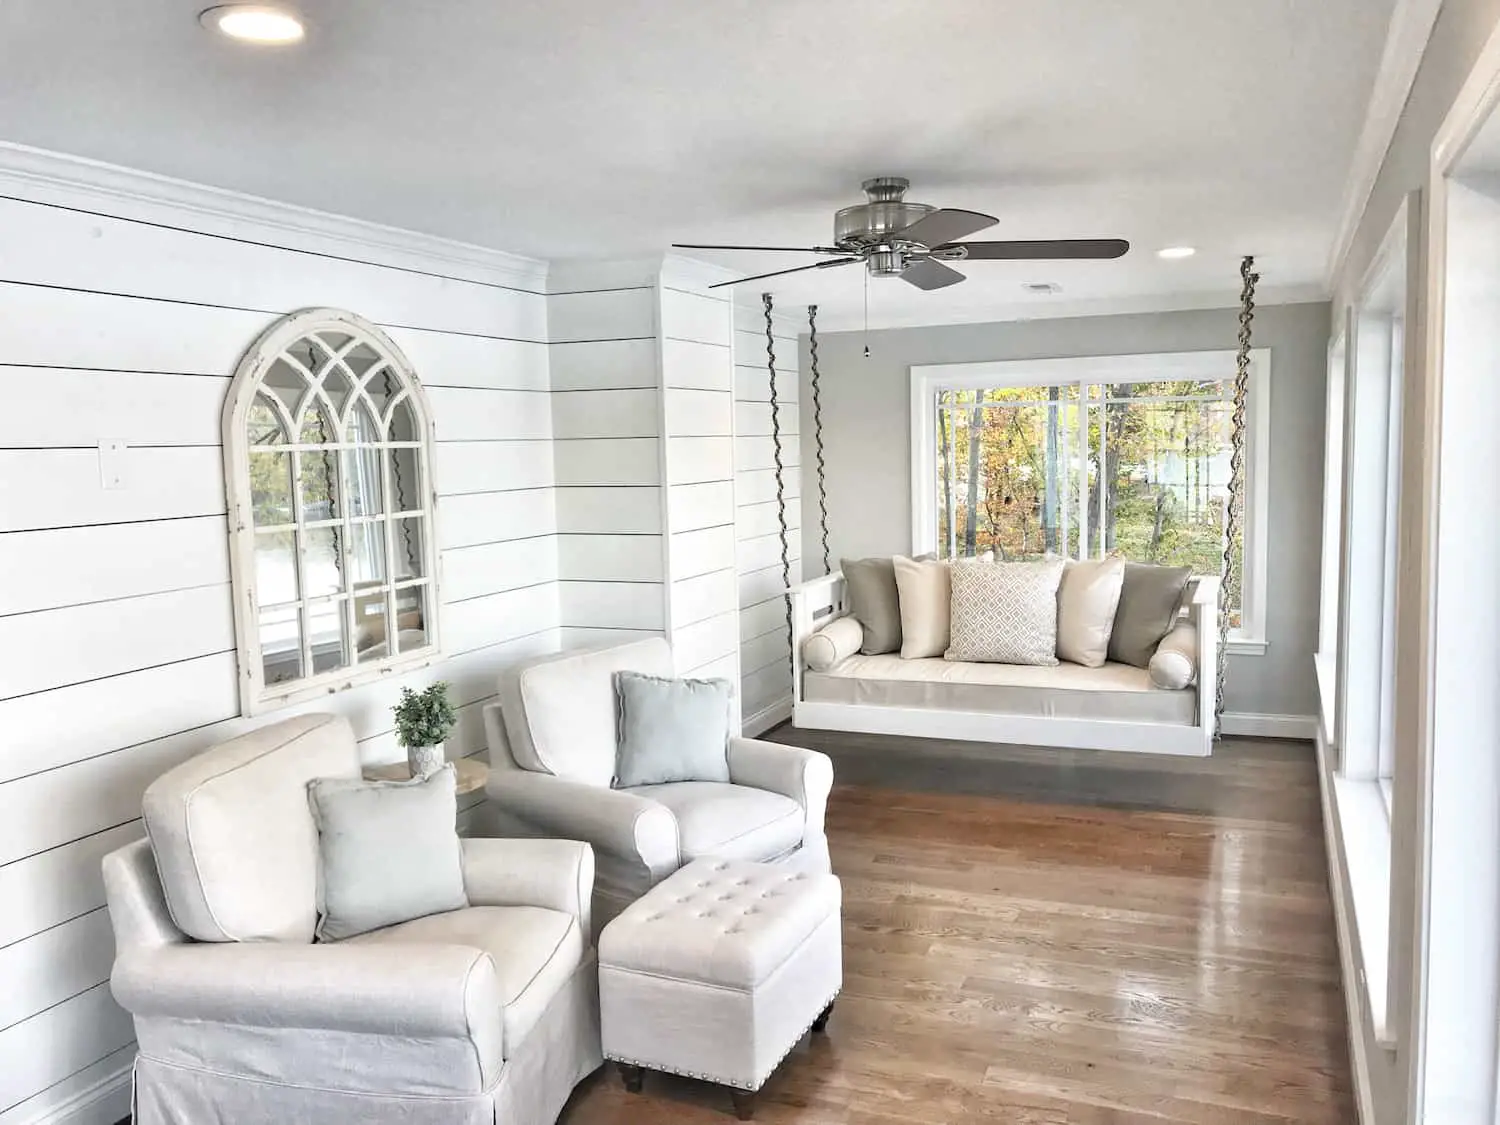
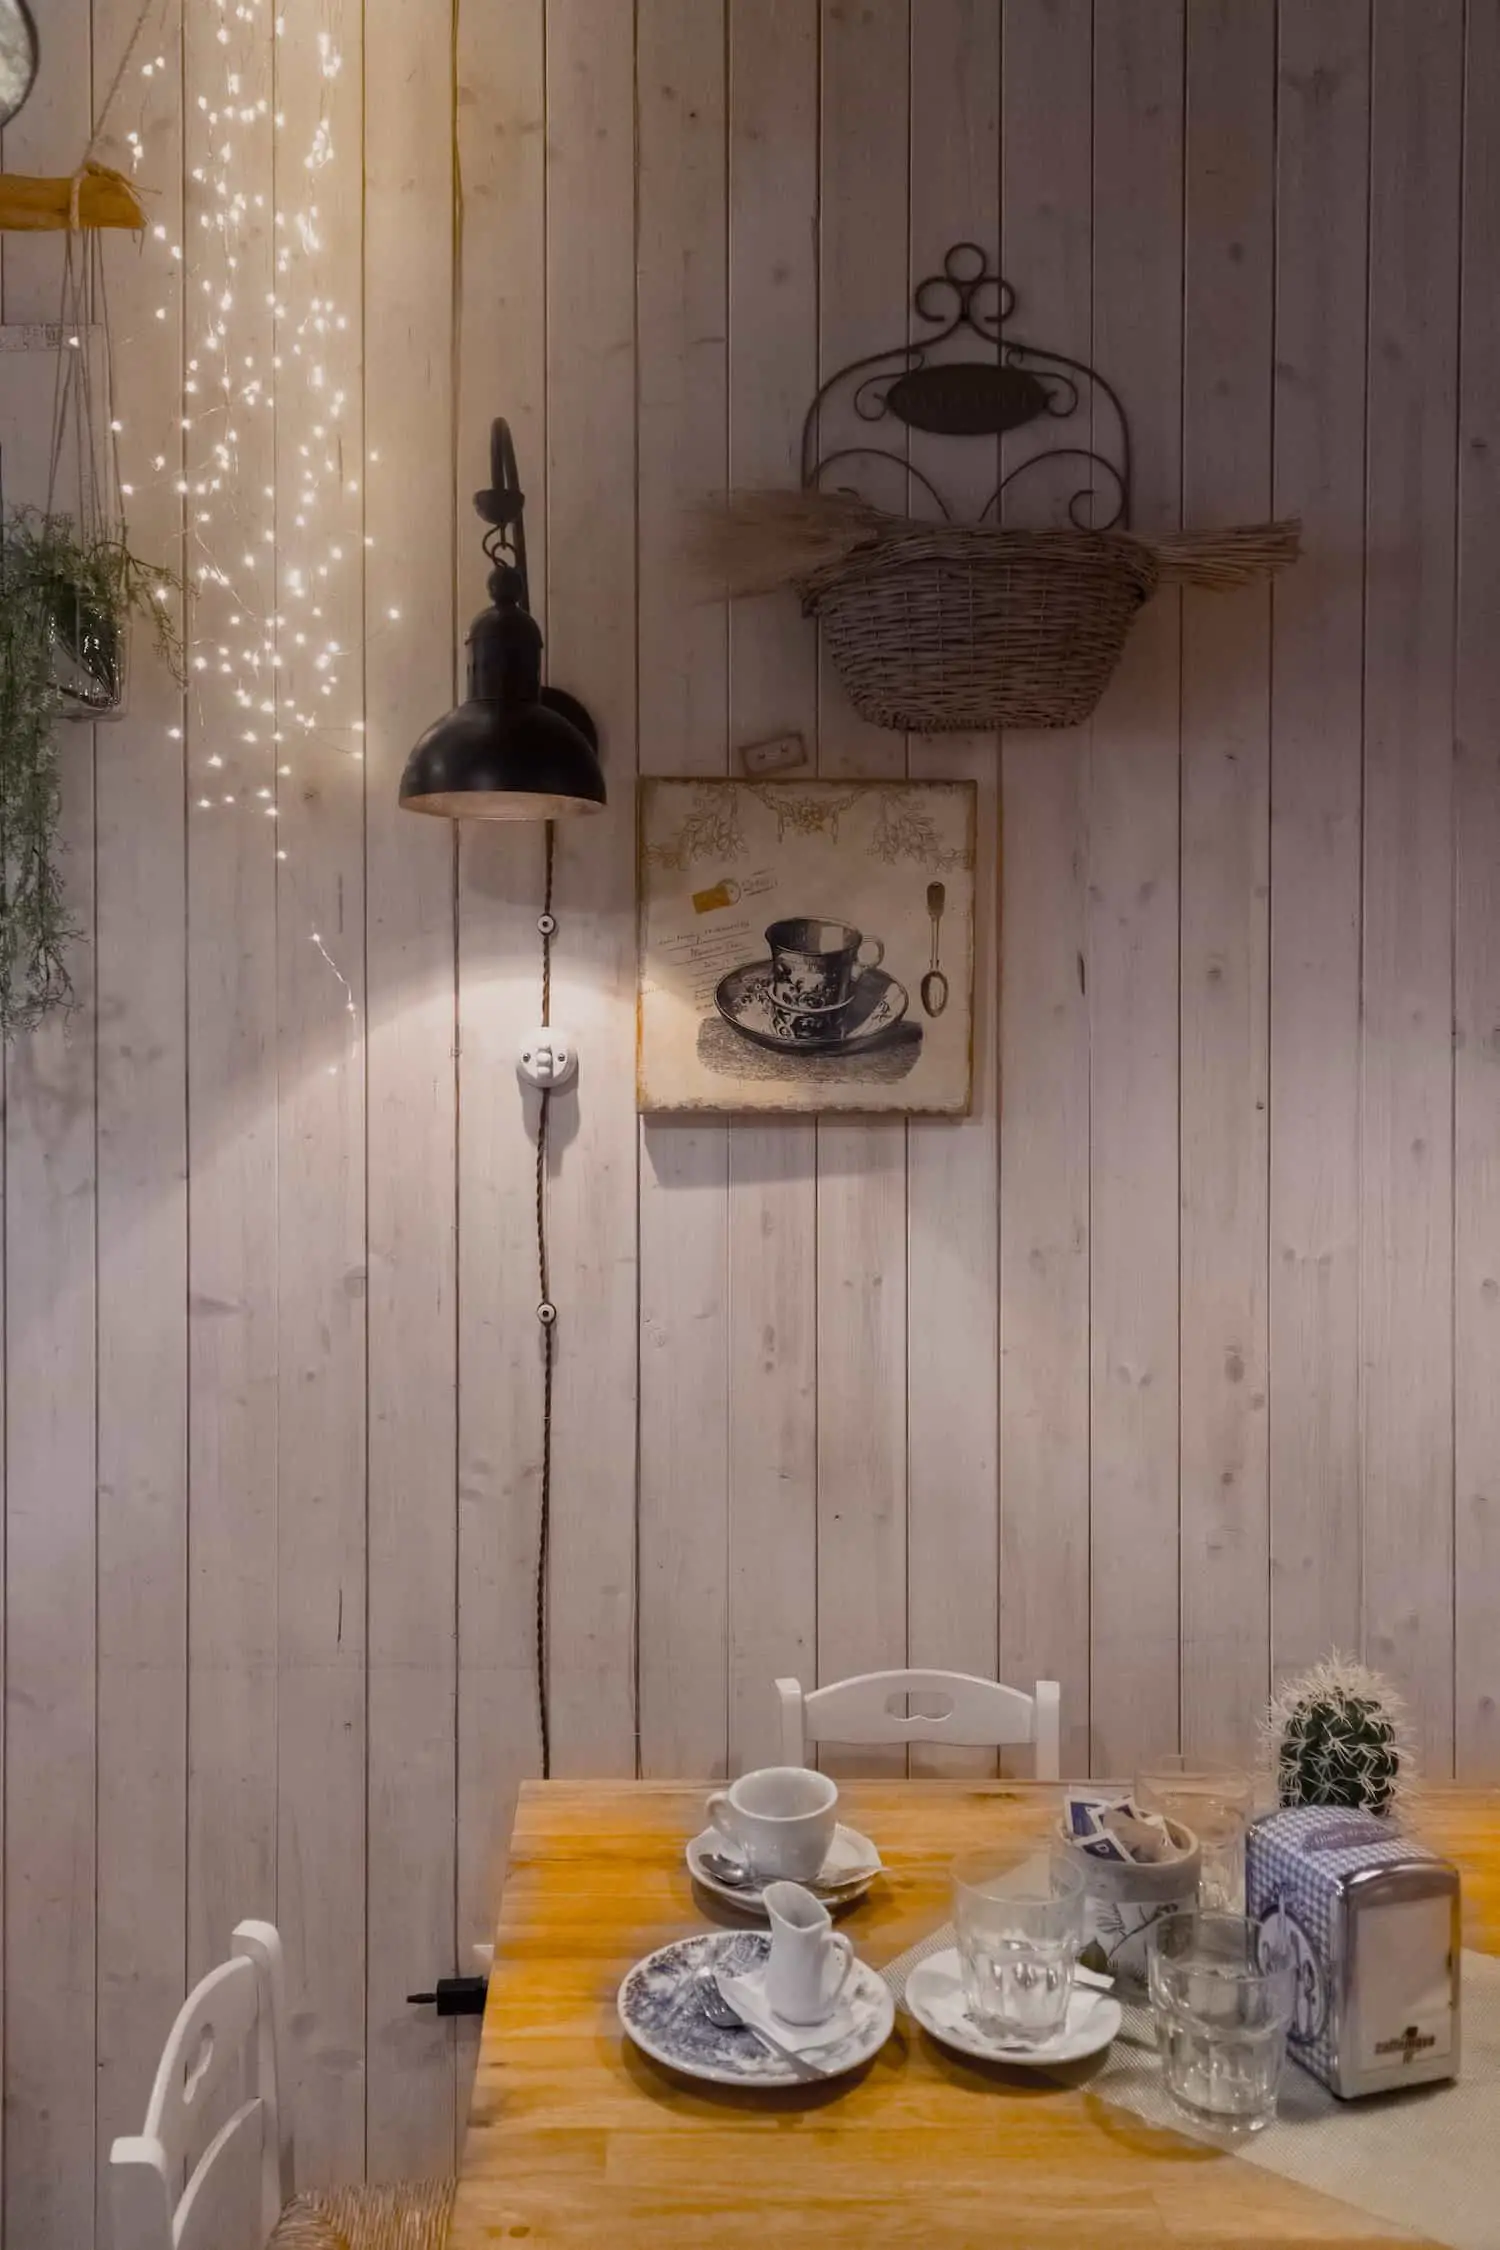
Edge Walls
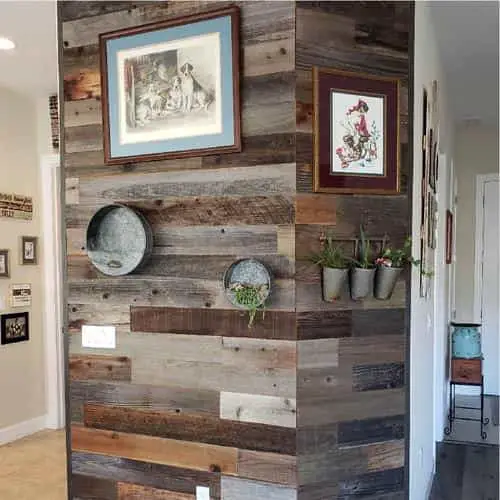
One great way to make use of shiplap for walls, is to use it for spaces that may otherwise be under utilized, or not highlighted to the greatest aesthetic advantage. Using shiplap in these areas can offer some incredible results, as highlighted here in this great example.
Alcoves and Entryways
Highlighting a space such as an entryway, or small alcoves within your home is an excellent way to create a powerful visual effect. Using shiplap within a small space can create a delicate accent that provides great visual appeal to your home.
Kitchen and Dining Spaces
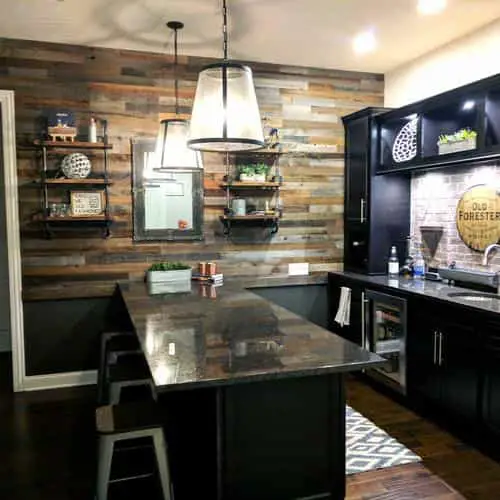
Achieving a rustic and vintage look within a kitchen, is not the sole prevue of those seeking to have a ‘country kitchen’ type of look. Though shiplap for walls definitely provides great additional authenticity to such a look, it can also add incredible contrast and visual value to more modern designs.
Living Room and Feature Walls
A room with a single color can often become overly monotone in appearance, and many designers and home owners like to include feature walls that add accent and flair to a room. Using shiplap for walls in a living room can truly add great character and charisma to the space, and provide visual stimulation to walls that may otherwise feel barren.

Doors & Closets
We love the idea of sliding doors or closets made with shiplap, as it adds truly inspired design to elements of the home that are often overlooked. By using shiplap to cover doors in your home creates incredible design flair that really looks impressive.
Shiplap Supply & Where to Buy Shiplap
As shiplap has been in use for such a long period of time, it is easy to find and source the raw materials needed – the lumber itself can easily be sourced from an lumber store, or you can visit any of the many specialty suppliers of ready-made shiplap products. A summary of some of the supplier available in the US is provided at the end of this article.
There are many options when selecting the wood that will be used in your project. In fact, there are even peel-and-stick options available to create the textured and desired effect without the need for too much wood work or cutting of any kind. Many suppliers, such as Plank and Mill offer prefinished boards that are made to create the authentic rustic board feel that many are looking for, and are available in a wide variety of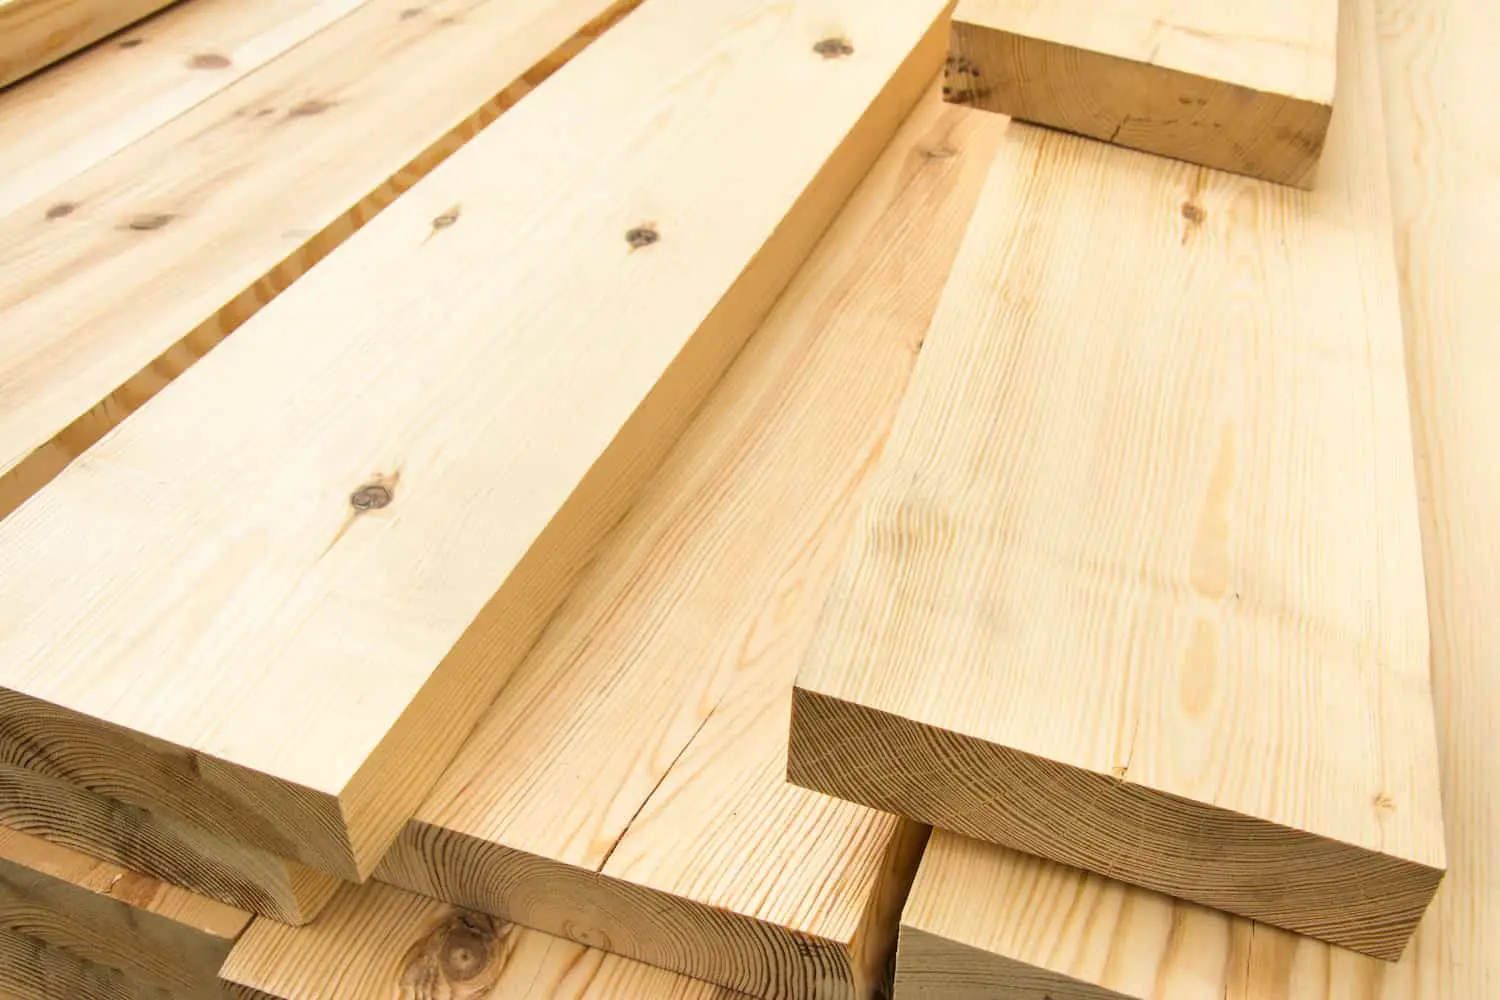 colours, and weathered effects.
For the more ambitious however, shiplap can be made from nearly any wood material that you may have available, whether pallet wood, or other similar sized materials. These types of projects do require a lot of additional effort, but do provide a truly rustic and reclaimed look, and once sanded, stained and/or painted, add brilliance and texture to any space.
Installing Interior Shiplap for Walls
Installing shiplap on the interior walls of your home is one of the ‘darling’ ideas and trends today, and has designers and home owners raving about its aesthetically pleasing effects on any room. There are a number of great reasons to consider shiplap for walls in the interior of your home, and each offers great advantages over typical sheetrock or other materials.
Tools and Materials Needed
It is often said, that a job is done best when you have the right tools for the job. While installation of shiplap is quite straight-forward, you will do yourself a great favor by having the right tools on hand before getting started. Preparing your materials and tools in advance will allow you to plan and implement the installation of your shiplap with fewer headaches, problems and mistakes.
Stud finder – using a stud finder has obvious advantages when placing shiplap over existing walls, where it is not possible to see the underlying framework. It will ensure you have the best and strongest support for the shiplap that will be placed on your wall. Additionally, using a stud finder will help to reduce wastage of nails by
Wire finder – using a wire finder gives you some piece of mind, and allows you to avoid damaging any wiring that may be run behind the wall, whether through drilling and/or nailing.
Tape measure – the ubiquitous and indispensable tool that is a part of every build project, a tape measure will give you accurate dimensions for your space, and obviously provides you the necessary details to calculate lengths and cuts for your shiplap boards, supports and other materials.
Carpenters Pencil – the humble pencil is used for marking drill points, cut lines and other important pieces of your build project.
Saw – obviously there will be a need to cut pieces to size during your build, and having a proper saw, whether electric or manual, is critical to making your shiplap for walls project a success. If your project will have corners, or bends, it will be immensely helpful to have a Miter Saw to assist you along the way, and as with any project that uses a lot of wood cutting, a table saw will be incredibly helpful.
Level – using a level will ensure you have a uniform and straight wall, without skewed lines and a crooked installation. As shiplap for walls has many parallel lines, it is important to use a level to ensure all things are well lined up, so the visual effect is not distorted by irregular or off-line placement of your shiplap boards.
Speed Square – when working with shiplap, it will be important to make sure you corners and cuts are square, as much as using a level will help you to ensure your alignments are straight and correct. A speed square is the perfect tool to use, and will provide you with a perfectly aligned and arranged installation.
Square Cut Nails – when working with shiplap for walls, many design experts suggest using genuine square cut nails to ensure the proper ‘rustic’ effect is maintained, and your shiplap wall looks as authentic as possible. For this reason, using square cut nails provides the necessary vintage look and feel that you are looking for.
Wood/Lumber – it goes without saying, that having the necessary wood of the correct size and shape that you are looking for, will be critical for your project. Sourcing the wood, or using pre-made panels will obviously be required before your start your project.
Optional:
Calk and Calk gun – in some cases, calking may be used between the gaps in your shiplap installation. If calk will be used, having a handy and quality calk gun will be a necessity.
Adhesive/Glue – adhesive is often used as an additional layer when placing the shiplap panels on the wall, and can add an extra bit of stability to the installation.
Placement & Building
The basics of shiplap installation is straight forward, and essentially involves measuring and outlining precisely how you want the boards to be placed, and cutting them to the sizes that meet the design you are looking to achieve. Once this step is completed, placing the boards will be the repetitive process off measuring, squaring marking and nailing them into place.
 The size of the gaps you leave between each board is obviously a personal choice, though traditional shiplap installations were done in such a way as to create the smoothest surface possible from the installation. Historically, many shiplap walls were covered with a guaze-like later, upon which wallpaper was placed, giving a smooth appearance. Today, however, the visual appeal is in the look of the boards themselves, and as such, there is some flexibility to exactly how the boards are placed, and you have the choice to create a layout that suits your own personal taste.
Shiplap can be installed horizontally, or as noted previously, can also be installed in vertical, or even diagonal orientation. Using logical design techniques for making a space look larger, there may be cases where vertical installations make sense, as doing so will create a visual effect that makes a room feel larger, with increased height.
Summary
Selecting, building and enjoying your interior spaces is a great experience, and these shiplap for walls inspirations are affordable and beautiful options to truly make a room amazing. Whether to add authenticity and character to a room, or to highlight and accentuate specific areas of your home, using shiplap is a brilliant and easy way to achieve fantastic result.
For some other great articles on other home improvement, prefab homes and other simple living and lifestyle ideas, check out some of our other articles on Lifestyle and Home Design, and learn more about some great solutions and inspirations. Also be sure to check out all of our articles on Backyard Bunkies, Garden Houses and Sheds, and all the various inspirations that we’ve highlighted at TAG Level.
